DDAL: Fire, Ash, and Ruin Review
A few months ago, James Haeck released the Fire, Ash, and Ruin on the DM’s Guild. It’s an Adventurer’s League module for 11th-16th level characters. Before I even dig into the text, two things: one, I worked with James repeatedly while he was the editor for EN5IDER (which won’t influence this review, but… disclosure); and two, I’m a fan of any support for third-tier play. I know very little about the constraints of the Adventurer’s League, though, so I’ll mostly be studying this through the lens of any old group in their home game.
There will, obviously, be spoilers.
The Setting and the Hook
As part of the Tomb of Annihilation AL season, the adventure necessarily takes place in Chult, but it’s a volcanic, ash-covered waste rather than more jungle. The structure of the adventure involves traveling to a location and exploring that location to the bottom of its depths. (It’s a classic structure for a reason.)
Right from the start, I have to wonder what group gets through content quickly enough to finish this in four hours. If any group I’ve ever known got through this in twelve hours, it’d be near a miracle. To put that another way, this is more content than the AL’s 4-hour label led me to expect, and that’s great.
There are four different hooks to work with for this adventure, two of them faction-locked. The general-interest hooks are fine, normal kind of stuff. The Order of the Gauntlet’s special hook wants the players to permanently modify the dungeon, so of course I’m a fan. It’s the Lords’ Alliance mission that’s really cookin’ with gas, though – they give you a one-shot magic item to use against the final boss, which lets you extract information from him. It’s a secret mission that can shift the whole context of a fight and give the adventure a minor twist at the end. This is a great touch.
I do have a concern that the Order of the Gauntlet’s mission might be flat-out impossible. You need to cast a spell (from a scroll) with a 24-hour casting time, while making DC 15 Con saves every hour to avoid taking a level of exhaustion. That is… probably not going to happen, not even with advantage on every roll. Most characters able to use a hallow scroll are going to hit Exhaustion 6 even after burning through any remaining slots for greater restoration.
Part One
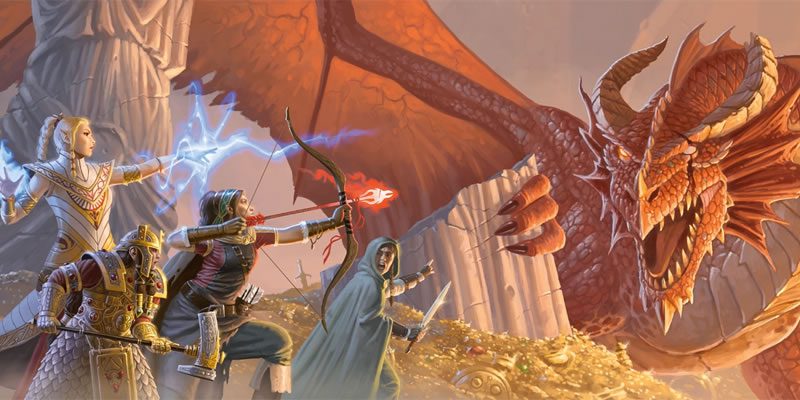
After the hook, the first encounter is the red dragon Cyndreth. I like that the adventure tries to push this toward conversation, but the text – as far as I can tell – doesn’t specify her as a young red dragon for another nine pages. The “conversation trigger” is dealing 50 damage to her (out of her 178), and the fact of the matter is, that might go by awfully fast at 11th+ level, along with the rest of her hit points. On one hand, that’s a shame, because “red dragon team-up” is awesome; on the other, until D&D backs off of “basically all red dragons are chaotic evil and only want to destroy and enslave blah blah blah,” it’s hard to see how letting Cyndreth get what she wants is anything but condemning a future generation to still more red dragon menaces. To put that another way, alignment rules are the worst. (Not the module-writer’s fault.) The PCs couldn’t know at this point that Cyndreth’s mission has already utterly failed – her wyrmling is super dead.
Since there’s travel, there are also hazards and optional encounters, providing some resource attrition and chances at easy encounters to show off the strength of high-level characters. It’s fine. If this weren’t AL-directed, I would love to see this section written with Adventures in Middle-Earth-style, or UA-style, travelogue rules in mind. Dealing 2d6 damage at a time, as the hazards do, means that you’re skimming off the veeery top of those high-level hit point totals.
Part Two
This section opens with a near rehash of Part One: Cyndreth, and some shorter overland exploration to find the entrance. I mean, it’s not important, but if we’re calling this a three-act structure, the second act starts once you’re in the door.
From here, we get into serious dungeon-crawling, with a good mix of interesting things to learn, fight, and steal. Most areas have something to fight, as well as something else to see and do. Part Two, section A has 4 fights in 6 areas; granted, in one of those, it’s a guardian that just wants to escape and raise an alarm. Section B introduces an Abyssal Wild Magic table, so things could start going bad real fast at this point, if you have a caster-heavy party. Sure, it’s a 5% chance per spell, but many of these effects could ruin your day. It’s not a bad thing, in terms of adventure-writing. The players will surely find it memorable.
The one thing I’m a little sad about here is that the module indicates that a whole area is shrouded in serious magical darkness, but immediately soft-pedals it with magical fire that pierces the darkness. If the PCs had to go through some darkness to get to the fire that solves the problem, that would have given the situation more teeth.
The area descriptions in section B are great, evocative stuff. I particularly like the pack of manes flailing ineffectively at the PCs as the PCs pass through. The first three encounters here are all trivial-combat or no-combat, with hazards, clues, and interaction. The PCs can start collecting power-ups to help them in the final boss fight, so taking time to explore the whole dungeon makes sense, and interactions carry extra payoff. (Even if it means you’re spending more resources…)
Part Two then moves into what I can probably call a minor boss-rush – individually not too bad, but the dungeon conditions are such that you really don’t want to take short rests, much less long rests. Each fight has a named demon and a unique environmental feature or two. They’re punctuated with those interactions that make the boss fight easier. It’s a shame that the wizard spirits other than Alkana don’t get the same level of detail.
Part Three
The conclusion of the adventure is, of course, the throwdown with Immilor. If the PCs grabbed all of the debuffs to his power, he’s an easy one-round kill if they’re not completely drained of resources. He fights alone, which is the main problem. Raxakon and Alkana are the ones that really matter; the other two are only nice to have. (I am aware that James has issued a revision to the module, but I am still working from v1.0; it doesn’t look like the revision has made it through the pipeline in the two or so months since he told me that he completed it.) Cyndreth would have a tough time making a big difference in this fight, I would think, since balors are fire-immune and Cyndreth’s claws and teeth aren’t magical. Still, she’s another bag of hit points.
I like what goes on with the terrain of this fight, Immilor’s roleplaying notes, and the Lords’ Alliance secret mission. Cyndreth’s story gets a satisfying conclusion, if she survives.
What Works
The area descriptions are solid, and I like the wizard ghosts both as NPCs and as game mechanics. A demonic, volcanic interlude in a long stretch of jungle content is all to the good. The Abyssal Wild Magic is cool. The extra things that are going on in each encounter – the hazards and such – are interesting factors, and I’d like to see more published adventures do that kind of thing.
The maps look cool.
What Doesn’t
I haven’t made a serious effort to judge the difficulty of the fights in this adventure, because the reason James has worked up a revision is that it received sharp criticism for being insufficiently challenging. Knowing what I know about PCs of 11th level and above in 5e, I find that easy to believe. (Thanks, Marsupialmancer! Your stories have been super useful to me.) There are only two places in the whole text that offer modification for parties of different strengths.
The maps are hard to read, and I’m not sure what the first one is showing. No map is marked with section A’s rooms, but maybe they’re supposed to go on the unmarked first map.
One of the adventure hooks is a story about yuan-ti trying to make a compact with Immilor. It’s not clear what the Harpers want you to do about this. They just tell you about it, so presumably your mission is to stop it from happening. Over the course of the adventure, there are a few references to the history between the Krahharuan wizards and the yuan-ti, but nothing to act on. Assuming there’s some pre-fight banter, Immilor reveals that he rejected the yuan-ti embassy and murdered all but one of them.
The text suggests that the players learned from this that the yuan-ti are working to summon a being of ultimate evil. Just from reading it, my takeaway is that they failed, and I don’t know anything about what they’ll do next. It looks to me like Immilor solved my reason for coming here all on his own. Sure, he should get cast back into the Abyss, but this is the bad kind of bait-and-switch. It’s also incredibly common in published adventures. If the PCs don’t have a few minutes of pre-fight banter with Immilor, they probably never learn even that much, and just find a few seriously charred bodies.
The central problem is that the emotional beat right before the climactic battle is, “Um… oh? The outcome would have been mostly the same if we’d stayed at home?” Even more so if they agreed to rescue Vastonash and had any emotional investment in it. Because of the constraints on what an AL adventure can do, Immilor isn’t doing anything else that demonstrates his wickedness, beyond defending his lair and avenging his henchdemons.
Overall
If you’ve already accepted that no adventure is even intended to survive contact with the DM, this adventure is great. It’s got plenty of good pieces to steal. It isn’t even a great stretch to fix: crank up the difficulty of the fights and rewrite the conclusion of the yuan-ti thread. I think that would be the rug that pulled the whole room together. If you’re running it, dig into James’s lavish descriptions and push them even further to express the vileness of standing on an intrusion of the Abyss into Prime.
In the face of these critiques, you have to understand that WotC’s official mega-adventures are getting judged on how well they can be broken down for parts, not whether they hold together on their own. (Except for Curse of Strahd, which from what I hear is just magic right out of the gate.) I think it would be grossly unfair to hold adventures by a single writer to a different standard.
If and when a revision shows up on the DM’s Guild, I will update this review.
The Revision is Here!
Version 1.1 reached the DM’s Guild earlier this week, and James has made a number of fixes. There are inevitably going to be some that I miss, because I don’t have a full change log at my fingertips. Here’s what I’ve caught:
- The issue with hallow‘s casting time making it almost certain death in the dungeon’s environment (in the Faction Assignment hook) got resolved by introducing a magic item capable of casting hallow in a single action, by destroying the item. Good fix.
- Part One: The fight with Cyndreth got tweaked (she shifts to negotiation after 100 hit points of damage rather than 50), Cyndreth got promoted from a young to an adult red dragon, and the overland travel hazards got trimmed down to a single saving throw. There’s explicit handling for Cyndreth transporting the PCs to the adventure site – a logical outcome of the encounter that also negates the half-page of hazards from the first version. Good changes, even though I liked the hazards before. There’s still some danger that the PCs murder Cyndreth before she can get a word in edgewise. I assume there are also session-length concerns motivating this change.
- Part Two
- The stone golems in area A3 were scaled down in v1.0, and are now back to full strength, or greater if the PCs are a Very Strong party.
- The shadow demon encounter in A4 is more dangerous and interesting. There’s a chance that things go badly enough to be a real problem, but it’s quite a slim chance.
- A5 is a harder fight.
- A6 is a smaller fight… but this is not their final form. The firenewt warlocks become exploding fire elementals when killed, so um. That’s a lot more damage output. (Fire immunity would be obscenely overpowered here.)
- James wrote a whole blog post to explain a change to Region B’s general features.
- Resting in Region B was dangerous before, but it’s even more so now.
- Entering B1 now closes the way behind you (so prepare disintegrate, I guess), to make sure you can’t retreat to Region A to rest.
- The benefits of most of the wizard spirits are toned down.
- In B6, Goryx got promoted from a hezrou to a nalfeshnee, a Challenge rating boost of 4. That’ll learn ’em.
- In B7, the damage of the hazards got doubled.
- Part Three has no technical changes of its own, but the changes listed above may make a big difference in the overall sense of challenge – especially the reduced contribution of the wizard spirits.
- The first map in the Appendices is now marked with area numbers. This is a big improvement.
As a result of these changes, I’ve adjusted my rating for the module, from a 7/10 to a 9/10. This adventure has been put through its paces by many more adventuring parties and beefed up appropriately. It’s more than just the lethality that has improved – there are also new wrinkles in several of those encounters that make them more compelling. Also, for real, if you’re publishing adventure content for characters of 11th level or higher, read what James has to say about forbiddance. It’ll save you a headache.
One More Note
On a personal note, over in Harbinger of Doom, I’m celebrating 400 posts with a drawing to give away a copy of Betrayal at Baldur’s Gate. Go enter the drawing!