The Island with No Name (1st Level Adventure for D&D 5e) – Part 3
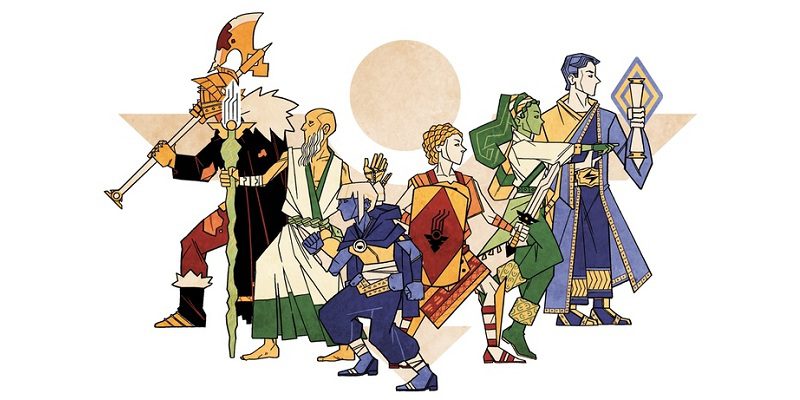
The Island with No Name is a starter adventure for four first level characters. The adventure is set in my Seas of Vodari campaign world, but can be easily adapted to any setting. The adventure is highly inspired by Treasure Island and other classic treasure hunts, but provides enough of its own take on this classic story to be both familiar and new.
In this adventure, players follow a map to a mysterious island in search of the hidden treasure of Captain Blackheart. Along the way players will be challenged by rival treasure hunters, rough seas, dangerous monsters, skeleton pirates, a trap-filled temple, and a final showdown with Captain Blackheart.
The following is part 3 of a 3-part series that provides an entire starter adventure for DMs looking to run a treasure hunt. Part 3 takes the treasure hunters to the Temple of Morto and a final showdown against Captain Blackheart himself.
The Temple of Morto
The path you have been following starts to wind and climb higher and into some hills. After traveling for 20 minutes, you find the temple mentioned in the journal. Towering over the withered growth and vines is a massive 60’ tall skull that has been carved out of rocky hillside. The rock has been bleached white and the eyes sockets glow orange, lit from within. The only entrance appears to be the mouth.
Looking into the mouth, players will find a dark, 60-foot long square stone passage that is 10’ wide and 10’ high. The stonework is ancient but generally intact. The hallway ends in a staircase that descends 20 feet.
Halfway down the hallway, there are two side-by-side 5-foot-square pressure plates that are triggered by 20 pounds or more. When either of the plates is triggered, four poisoned darts shoot out from spring-loaded tubes in the walls. Each dart makes a ranged attack (+8 to hit) against a random target within 10 feet of the triggered pressure plate. Any creature hit by a dart takes 2 (1d4) piercing damage and must make a DC 13 Constitution saving throw, taking 3 (1d6) poison damage on a failed save, or half as much damage on a successful one. Dust and dirt obscures the tiny holes in the walls through which the darts are fired, but they can be spotted with a successful DC 13 Wisdom (Perception) check. With a careful inspection of the floor and a successful DC 15 Wisdom (Perception) check, a character notes irregularities in the floor’s tile patterns that reveal the pressure plates. Wedging an iron spike or similar object under a plate prevents that plate from being triggered. Stuffing the wall holes adjacent to a pressure plate with cloth or wax prevents the darts from being fired. Triggering either plate fires the darts and disables the trap until it is reloaded.

1a – ENTRANCE CHAMBER
You descend down the stairs into the temple and enter a dark room with odd angles, roughly 30 feet wide and 25 feet at its deepest with a 15-foot high ceiling. Across the room, a short staircase ascends to a raised antechamber.
If the characters are using any source of light, they will find that their light casts a shadow in the shape of a skull towards the center of the room. A DC 15 Intelligence (Arcana) check will reveal that the shadow is being cast by necrotic magic and the shadow should be avoided. A character that makes a DC 10 Wisdom (Perception) or DC 10 Intelligence (Investigation) check can easily tell that the shadow is unnatural. Anyone who comes within 5′ of the shadow will feel weak and ill. Any creature that ends its turn in the shadow takes 6 (2d6) necrotic damage.
DM Note: If you are running this adventure for more experienced players, you can have the necrotic damage reduce their maximum hit points by the amount of necrotic damage taken until they are healed or even have their PC turn into a shadow if they die.
SKELETON FIGHT
Once the PCs have had a chance to interact with the shadow, have four skeletons enter the room, two from each set of stairs. If any of the PCs have a passive perception of 12 or higher, they will hear the skeletons approaching and avoid being surprised. If the characters are making noise or arguing, have them make a DC12 Wisdom (Perception) check with disadvantage to hear the approach of the skeletons.
1b – ANTECHAMBER
This small antechamber connects with the lower entrance chamber using a staircase. The antechamber contains heavy wooden doors on the left and right and a set of steel double doors in the center.
Each of the wooden doors can be easily opened using the latch. The large double doors in the center are sealed with magic. There are two key holes and a message above the locks that says ‘Death to anyone who attempts to enter this temple without the keys.’
Both locks are protected with powerful magic and cannot be opened without the key, a knock spell or a successful DC 25 Dexterity check made by a character using thieves’ tools for each lock. Any failed check to open a lock will trigger a poison spike and require the creature to make a Dexterity saving throw, taking 13 (3d8) poison damage on a failed save, or half as much damage on a successful one. The mechanical poison spike trap can be found on either lock with a DC 15 Intelligence (Investigation) check. A DC 15 Intelligence (Arcana) check will reveal the locks are protected by arcane lock.
2 – THE ENCHANTED FOUNTAIN
The door to this room is easily opened and when they look inside read the following:
The room is a 25′ by 25′ square with the top far right corner angled. The center of the room is filled by a finely carved and undamaged marble fountain containing water that is dimly glowing blue, lighting the entire room with an eerie blue light. A statue of a beautiful crying woman sits in the center of the fountain with water slowly flowing from her eyes. The outer edge of the fountain is carved with images of skulls and thorns. A plaque on the fountain reads ‘Only one who has drunk from the fountain will find what they seek’.
A DC 15 Intelligence (Arcana) check will reveal that the fountain has an aura of powerful transmutation and enchantment magic.
Roll on the table below for any PC who chooses to drink from the fountain. If any PCs stay in the room for more than a minute have them make a DC 13 Wisdom saving throw, feeling compelled to drink from the fountain on a failed save.
Once five minutes has passed and at least half of the party has drunk from the fountain, the first person who drank from the fountain and is alive, will start to feel nauseous and vomit up a key that unlocks the left lock on the antechamber’s double doors.
| d8 | Outcome |
|---|---|
| 1 | The water is cool and refreshing, need not drink again for the day |
| 2 | The water is suspiciously warm and tastes like blood. Take 2d6 poison damage and poisoned, or if make a successful DC13 constitution saving throw, take only half damage and not poisoned. |
| 3 | Becomes invisible for 1 hour |
| 4 | Dancing lights for 1 hour |
| 5 | Changes gender for 1 hour (or become a skeleton for one hour) |
| 6 | Can see the future, advantage on next roll |
| 7 | Tastes of cinnamon, burns like fire. Take 2d6 fire damage. |
| 8 | Potion of Love for 1 hour (or heals 2d4+2) |
3 – THE MIRROR
The door to this room is easily opened and when they look inside read the following:
The room appears to be a 25-foot wide by 50-foot long rectangle with the center left top of the room pinched at an angle. As you look closer you notice the room is actually only half the size with a mirror on the far wall reflecting a small table and rug on the floor.
A closer look around the room will reveal a table with candlestick and an open and empty carved wooden box, two green chairs and a bearskin rug on the floor. The mirror is not a reflection. It is showing the contents of another room. A character who looks into the mirror will see (no checks required) a table with a lit candlestick and a closed carved wooden box, two green chairs and a bearskin rug.
If any character attempts to touch the mirror, they will find that it is not there and is actually an illusion which is dispelled for them instantly and clearly reveals that the room is actually 50′ wide, with the far side containing another table and rug. As soon as the illusion is dispelled, have the bearskin rug from the far room become animated and attack. The bearskin rug uses the stats of a brown bear.
Once the rug is defeated, the players can investigate both rooms. Have them find the key in the box in the far room, in the mouth of the defeated rug or have a PC vomit the key if they fail to find the key.
4 – The Final Confrontation
The PCs should now have both keys and can open the double magical locks.
As the second key unlocks its lock, there is a flash and then a greenish glow surrounds the doors. The locks fall to the ground and the double doors slam open, revealing a hallway filled with thick, black darkness that enters into the antechamber.
HALLWAY OF DARKNESS
This 10’ hallway and the stairs beyond are covered by magical darkness with a 15′ radius centered at the top of the stairs. The players can choose to enter the darkness and walk through it to the staircase beyond. The spell will end automatically after 10 minutes. The hallway ends in a staircase that descends 10′ into a dimly lit chamber beyond.
4 – Final Confrontation
As you descend the stairs the room beyond is dimly lit and you hear the trickle of water and the light clink of metal on metal.
As the players get halfway down the stairs, they will start to see a large 80′ wide by 75′ deep room with a 30′ high celing. The room is dimly lit by some wall sconces on each of the six pillars in the center of the room.
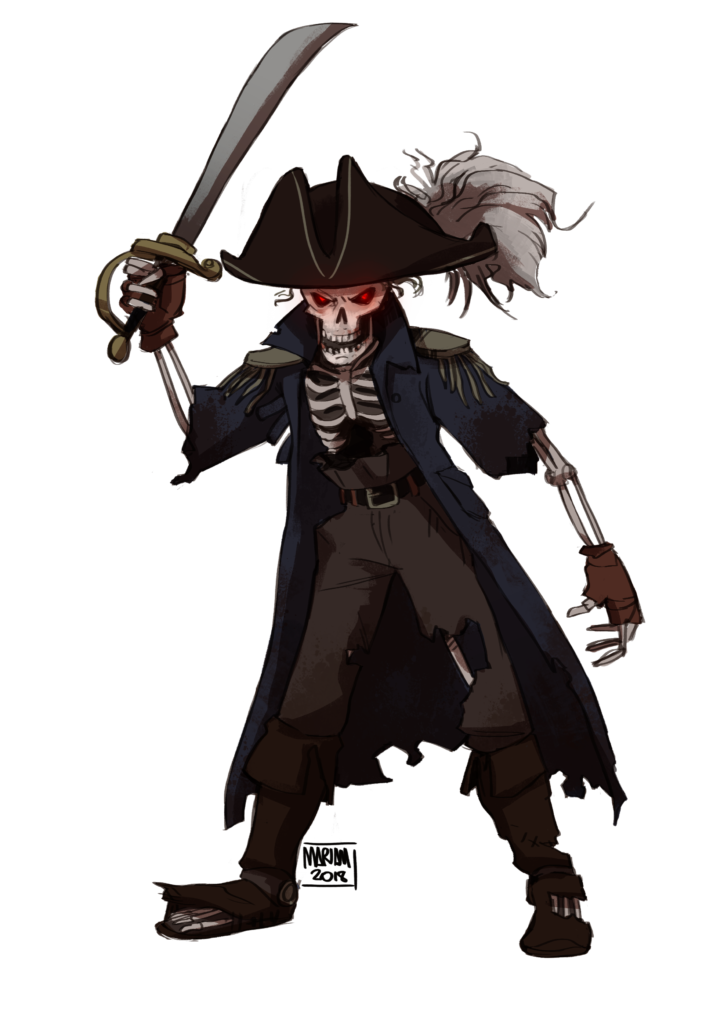
At the far end of the room is a raised dais with a carved skull mural behind it. Water flows from skulls’ mouths on the wall and down the stairs of the dais into the room, pooling in the center near the pillars. In the center of the pool is a large pile of wooden chests, jewelry and coins. The clinking of coins ends and you hear laughter and a skeleton wearing a captain’s hat, torn clothing and armor emerges from behind the treasure pile. He draws his cutlass and looks at you with glowing red eyes.
The water is flowing slowly into and out of the pool. The pool is only a few feet deep, but should be treated as difficult terrain.
Captain Blackheart wants to talk to the intruders and the following dialog can be used to provide a source of banter with the players.
- ”Defeat me n ya can have me treasure. If ye lose, Morto will have yur souls too. Ya’ll roam this here island as skeletons for eternity. Savvy?”
- “My greed ‘as cursed me and you’ll suffer the same. Leave now and forget me treasure.”
- “Morto has cursed me and me crew. He’ll take you scallywags as well.”
Captain Blackheart could pose a tough challenge for some parties and you might want to have successful persuasion checks force Blackheart to ponder what has been said for a turn, taking the dodge action. If the fight is going easy, have one or two skeletons (or an amphibious monster) rise from the pool to join the fight.
CAPTAIN BLACKHEART
Medium undead, lawful evil
Armor Class 14 (Broken Armor)
Hit Points 65 (10d8+20)
Speed 30 ft.
| STR | DEX | CON | INT | WIS | CHA |
| 16 (+3) | 14 (+2) | 14 (+2) | 14 (+2) | 10 (+0) | 14 (+2) |
Saving Throws. Str +5, Con +4
Skills. Athletics +5, Intimidation +4
Senses. Darkvision 60’, passive Perception 12
Languages. Common
Challenge 2 (450 XP)
Undead Fortitude. If damage reduces Blackheart to 0 hit points, he must make a Constitution saving throw with a DC of 5 + the damage taken, unless the damage is radiant or from a critical hit. On a success, Blackheart drops to 1 hit point instead.
ACTIONS
Multiattack. The captain makes three melee attacks with its cutlass. Or the captain makes two ranged attacks with its death bolt.
Cutlass. Melee Weapon Attack: +5 to hit, reach 5 ft., one target. Hit: (1d6 + 3) slashing damage.
Death Bolt. Ranged Weapon Attack: +4 to hit, reach 20/60 ft., one target. Hit: (1d8) necrotic damage.
REACTIONS
Parry. The captain adds 2 to its AC against one melee attack that would hit it. To do so, the captain must see the attacker and be wielding a melee weapon.
Conclusion
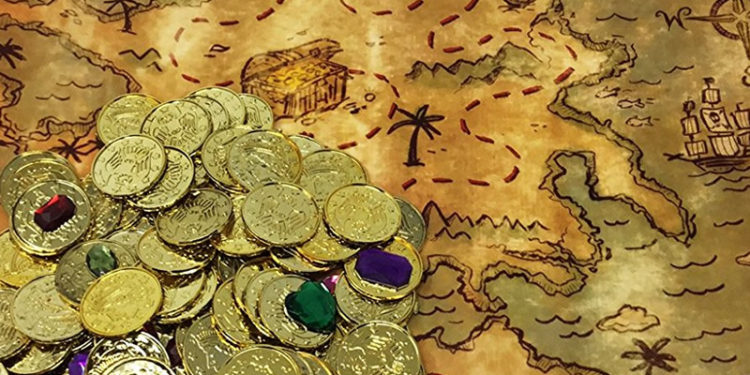
TREASURE
The treasure hoard contains the following:
-
Ship in a Bottle
-
20x chest of silver (250 ea.) = 500gp
-
2x chest of gold (250 ea.) = 500gp
-
2x small chests filled with gems (250gp) = 500gp
-
Small box of pearls (25 x 10gp) = 250gp
-
4x Small gold bracelet (25gp ea.) = 100gp
-
1x Pair of engraved bone dice (25gp ea.)
-
1x Carved bone statuette of mermaid (50gp ea.)
-
2x Potion of Healing
-
Spyglass 100gp
-
Compass 100gp
DM Note: This is a dangerous amount of treasure and you might want to provide a typical hoard for a CR 2 challenge as outlined in Chapter 7 of the DMG. In seafaring campaigns, larger treasures tend to be spent quickly outfitting ships.
Ship in a Bottle
Wondrous Item, very rare (requires attunement)
Escape the Temple
By killing Captain Blackheart, Morto’s curse has been lifted and he is free. The players should be given a short period of time to collect the most valuable treasure, likely leaving the chests of coins. With a loud rumble, the temple suddenly starts to collapse and fill with water. Morto wants to have the last laugh and will try to trap the adventurers in his temple and start the curse again. The chamber quickly fills with water and the ceiling starts to fall. After one minute has passed start having rocks fall from the ceiling each round, hitting players randomly with a DC 13 Dexterity save, taking 6 (2d6) bludgeoning damage on a failed save. If they continue to spend time collecting the treasure, increase the number of falling rocks and even double the damage to really indicate the danger of remaining in the temple.
Climbing the stairs and escaping the temple should end without incident if the PCs are low on hit points and resources or you could have them face another groups of four skeletons on the way out.
RETURNING THROUGH THE JUNGLE
Traveling back through the jungle should be easy and the characters should have no problem following the path along the stream. If a short rest is requested, let them find somewhere safe to recover without being interrupted such as high in the trees or in a clearing with good visibility. You can throw another random encounter (see chart in Part 2) at the players or fast forward to the beach.
What’s Next
As the PCs return to the beach, the adventure is over. Where you go from here is up to you and your players. The open seas provide countless islands to explore and sprawling ports cities to spend their coin in.
When the players arrive back on the beach, there are some scenarios that you can run.
READY TO SET SAIL
As they return to the beach, the ship has been repaired enough to limp home and is ready to go. While they weren’t able to get the entire treasure, the characters were able to collect treasure worth plenty of golden crowns. It’s time to sail off to the next adventure.
MAGS’ BETRAYAL
While the characters were busy in the Temple of Morto, Taggart’s ship faced another storm and crashed into the beach. Mags has teamed up with Taggart and the combined crews of both ships are all waiting for you on the beach with their weapons drawn.
TAGGART’S AMBUSH
A bright yellow light can be seen ahead, bursting through the thick green canopy. As you exit the jungle and enter the beach, something is wrong. It is quiet. The ship is almost repaired, but you can’t locate your fellow crewmates. Further down the beach, you see another ship that is beached.
Check Out My Pirate Adventurers PDF
Ahoy Lubber!
 With PIRATE ADVENTURERS you can provide your players with new player character options for 5th edition to create pirate themed characters. These options can be used to play an entire campaign in a pirate setting, or just to provide a player with more pirate flavored options than provided by core 5th edition materials.
Allow your players to dive into custom backgrounds, equipment, feats and shipboard roles created just for their swashbuckling pirates and privateers.
Product Information
This product will allow you to provide your players with additional player character options and equipment for your pirate themed world:
- 4 new variant backgrounds for the sailor background
- A boatload of pirate weapons & gear
- 3 new pirate flavored feats
- Shipboard roles for your characters to gain new abilities geared towards naval combat
These materials were designed to be used with 5th edition rules and can be played directly into your 5th edition favorite campaign.